Posts Tagged ‘Zion’

Beyond 830nm

One of the frustrations of the hyperactive shutterbug (me) is what to do with yourself after and before the ‘magic hours’, e.g., an hour or so after sunrise until an hour or so before sunset.  My answer:  near infrared (IR) photography.  Apart from special circumstances (including desperation), we would normally avoid shooting images with the sun directly overhead, but it turns out that this is the optimal time for recording (IR) images.  The images included in this entry demonstrate the absence of haze and rich tonality that attracts folks to the approach, but do not include any really vivid examples of Wood Effect, in which greenery acquires curiously light tones due to the reflection of IR light from foliage.  It’s Utah in the dead of winter, there is no foliage!
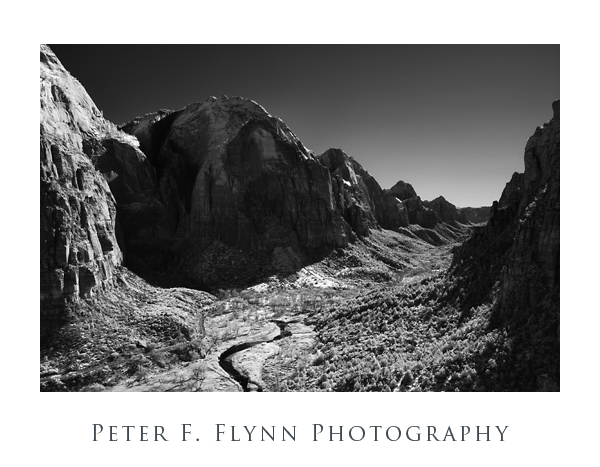
Zion CanyonThe image above, looking south down the canyon of Zion NP was recorded on January 18, 2009 at around 15:40 MST using the Nikon D200 converted to IR capture (see below) and the AF-S  DX Zoom NIKKOR 12-24mm f/4 IF-ED lens at 24mm.  Exposure was f/16 at 1/13s, ISO 100.
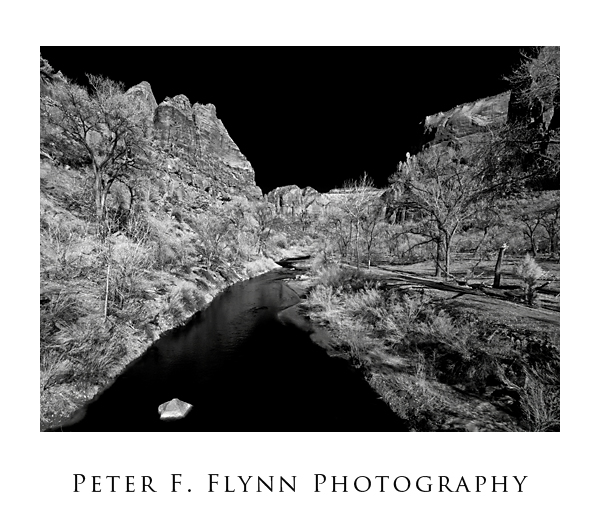
Virgin River & Zion CanyonThe image above of the Virgin River in Zion Canyon NP was recorded on January 18, 2009 at around 13:50 MST using the Nikon D200 converted to IR capture (see below) and the AF-S  DX Zoom NIKKOR 12-24mm f/4 IF-ED lens at 18mm.  Exposure was f/16 at 1/40s, ISO 100.

There are several ways to gear up for IR photography, and the method I chose was to send in my underused Nikon D200 digital SLR for IR conversion.  Digital sensors have high sensitivity to electromagnetic energy all the way from below 400 nm to about 1200 nm.  To avoid all sorts of trouble, an IR filter is placed over the sensor to block IR infiltration on the image.  IR conversion involves replacing the IR filter with a visible light filter.  The two most popular filters have visible light cut-offs at either 720 nm; which allows a bit of visible light (red) to pass through, like the Wratten 89B filter; or 830 nm, which renders a black and white image with greater contrast and tonal range than you can obtain with the 720 nm rig.  I chose the 830 nm filter set up, which is approximately equivalent in frequency response to the Kodak Wratten 87C  filter.  The conversion was done by Life Pixel Infrared Conversion Services*, of Mukilteo, WA.  It’s not particularly cheap at $375, but the folks at Life Pixel did an excellent job – no apparent dust left on the sensor during conversion and they also set a custom white balance.  All-in-all I believe it is an excellent value.  The turn around time for the conversion was about ten days.
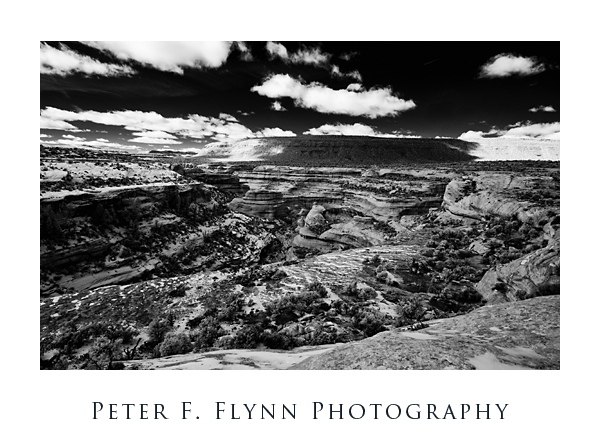
Kachina Bridge in IRThe image above of Sipapu Bridge in Natural Bridges NM was recorded on February 14th, 2009 at about 13:30 with the Nikon D200IR and the AF-S  DX Zoom-NIKKOR 12-24mm f/4 IF-ED lens at 18mm.  Exposure was f/16 at 1/13s, ISO 100.

There are a number of excellent photographers working in the IR.  Included are:

Reha Akcakaya : http://rehaakcakaya.com/

Stephen R. Brown:  http://www.srbphoto.com/infrared/index.html

Kenneth Farmer:  http://www.infraredvideo.com/

Laurie White Hayball

Cyrill Harnischmacher

Chris Maher# http://dreamsofthegoddess.com/

Joeseph Paduano:  http://www.joepaduano.com/

Fredrik Rasmussen:  http://www.momentcorp.com/

Martin Reeves:  http://www.thehiddenrealms.com/

Patrick Rice: http://www.ricephoto.com/abtpatrick.htm

The following websites are also worth visiting:

Digital Photography For What It’s Worth:  http://www.dpfwiw.com/ir.htm

Infrared Photography Buzz:  http://irbuzz.blogspot.com/

Infrared Photography Forum:  http://www.irphotoforum.com/

…and there’s a lot more out there…

*I am directing you to the image comparison page to avoid the very informative but slightly annoying voice-over index page.

#Some nudity, but tasteful.
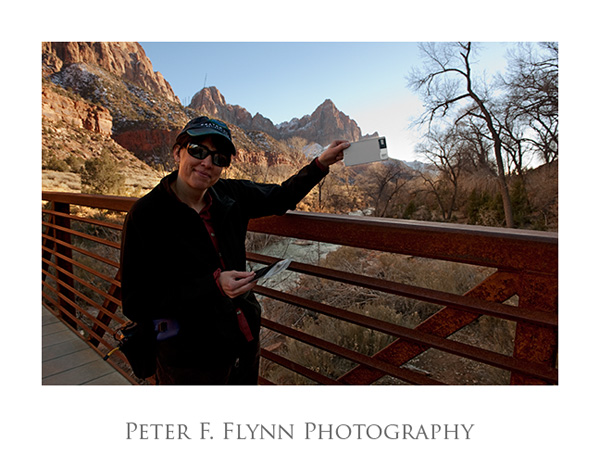
High Priestess of the WhiBal

Carla, High Priestess of the WhiBal

One of the boilerplate phrases in the blog are words to the effect of ‘…white balance set using the WhiBal card…’.  What the heck is a WhiBal card?  How do you use it?  Where can I get mine?  Does it operate by itself, or do I need to do something?  Be patient friends, all will be answered.  First, the WhiBal card, or generically the white balance card: This is a high-class piece of plastic manufactured to exacting standards by a number of companies.  I use the ones made by the good folks over at RawWorkflow Inc.  The device is an updated version of the photographers ‘gray card’, which reflects light falling upon it providing (after compensation) a reliable color reference.

To understand the need for this device, consider the following situation…  You are standing in a room filled with both familiar and unfamiliar objects, and the only light source is a red lamp.  Can you properly identify the true color of objects in the room under such circumstances?  Well first, since you will recognize some of the objects, you will be able to guess their proper color even if they look weird in the red light – this is cheating of course, but you cannot help doing it so we forgive you.  Even if you didn’t recognize all the objects you would still be able to make a good guess of the color for all of the objects since your brain is fantastically good at compensating for shifts in the color of the reflected light.  Once your brain establishes a color shift compensation, all objects will be interpreted in the same way.

We need this, or at least our ancient ancestors did.  Imagine you are running around in the jungle at dawn and the jungle is all over bathed in beautiful morning light.  Having awoken with a ferocious appetite you scout around for something to munch.  Soon you spy what appears to be a lovely green apple in the lush overgrowth (it’s heirloom apples, apparently they grew that way).  Complicating things is that the glowing morning light shifts the color of light reflecting from the surface of the apple towards the yellow or the red depending.  Without the ability to compensate for the color shift, you might not even perceive the apple.  Worse yet, guarding the lovely green apple is a serpent of nearly the same color hidden in there amongst some leaves of, again, almost the same color.  Without the ability to color compensate you might just miss seeing the snake and get bit and, because in the ancient time all snakes were incredibly poisonous, your contribution to human genetics would tragically be cut short.

Okay, back to the card.  Unfortunately, our instrumentalities (cameras) are not very much like us.  They need to be calibrated so that we can interpret the data they generate in terms that represent something useful, maybe even artistical, to us.  A white balance card is just a convenient reference color made out of virtually indestructible material.  Photo processing software programs like Photoshop, Lightroom, Capture NX2, etc., allow you to establish a light shift compensation (think of it as an overall color compensation) using the white balance card, which can then be subsequently applied to other photos recorded in the same light conditions.

Finally, operation:  It’s up to you.  Here Carla, High Priestess of the WhiBal, demonstrates positioning the white balance card in the optimal spot for reflectance readings.  Note the ceremonial headdress and sacred goggles.

Towers of the Virgin at Dawn

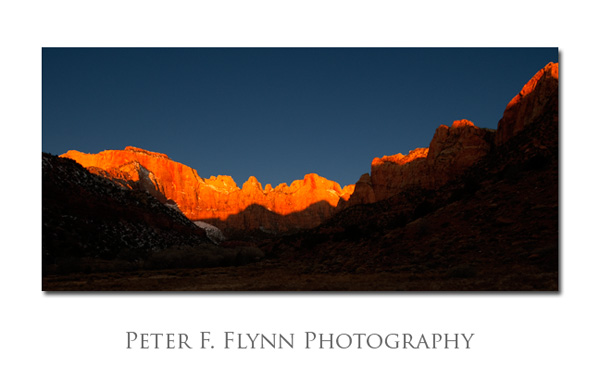
Towers of the VirginThe Towers of the Virgin at dawn are arguably the most excellent scene in Zion NP.  The Towers lie at the back of a large meadow in one of the main valley spurs.  They are best viewed from behind the Zion Human History Museum, which can most easily be reached from around the north side of the building.  The image was made on January 18 at around 9 am.  Given the time of year and the fact that one must wait until the angle of the sun must first clear the west valley wall, this seemingly late hour worked out pretty well.  During winter months, dawn is frequently accompanied by a stiff breeze that blows southerly down the valley.  Thus a sturdy tripod and decent winter ware (gloves!) are both a must.  Some of you will consider that the foreground is too dark, or perhaps that the Towers are too bright, or both.  Visualization.  Assuming that you have a properly calibrated monitor, the image you see is as close as I can get to the way the scene looked to me when the bits hit the Lexar.

Now for the technical stuff.  The image is the product of High Dynamic Range (HDR) engineering.   The basic idea is that there is a limitation to all current image display modes compared to the inherent dynamic range of human vision – this includes photographic film and printing papers and video monitors.  Dynamic range can be thought of as the variation between the brightest and darkest regions of a scene that can be perceived.  We need also to toss in the allied notion of the sort of number of subtle variations in brightness between the extreme of lightness and darkness.  Now it gets a bit gnarly.  First we need to define a parameter known as the Exposure Value (EV).  The EV has a standardized definition (ISO) in which EV equals to zero corresponds to an aperture (f-stop if you like) of 1, a shutter speed of 1 second at a media sensitivity value (ISO) of 100.   The human visual system has a relatively large dynamic range, spanning more than 14 EV.  This is far greater than the range that can be reproduced by the best photographic printing paper, which is about 6 EV, or even HDR displays that can reproduce a variation of up 9 EV.   The basic idea behind HDR imaging (HDRI) is that images can be combined to expand the range well beyond that of any of the individual images.  Hmm.  What is the point of generating hypothetical image files that cannot be properly reproduced on printing paper or video?  First, using a process known as Tone Mapping we can expand the apparent EV range in a sort of esthetically acceptable and relatively low noise way.  This conversion allows us to exploit the display media to its fullest extent (yeah, this is a bit oversimplified).  Secondly, although the EV range for printing paper is already fully optimized, there is a very real possibility that HDR video technology will continue to move into the mainstream.

The image above was generated by combining individual images spanning 5 EV (all at f/16 from 1/8s to 1/125s).  Wait, you observe, isn’t this within the range that can be reproduced by film/paper/video.  Yes it is, and this brings us to another use of HDR technology, which is to minimize the need for layer masks.  Proper rendering of images like the one above; which are composed of adjacent very bright and dark regions, requires working up very precise layer masks, which are time consuming and extremely tedious.  In the old days it would have been dodging and burning, but I seriously must doubt that anyone ever possessed the technical darkroom skill to render an image such as this one  (sorry Ansel).  White balance was set using the WhiBal card.  A version of the image recorded at f/16, 1/125s (EV=15) was converted using daylight white balance to more accurately reproduce the sky behind the Towers – this image was added to the tone-mapped, HDR image using one of those tedious layer masks I mentioned.  Tone mapping was accomplished using Photomatix (HDRsoft).  More HDR images and discussion to follow – God help us.

For more information I can recommend the excellent books by Christian Bloch and Ferrel McCollough, and the tutorials available on the HDRsoft website.