Posts Tagged ‘Overlay Move’

Enjoying the Magic at Cape Royal

Sunrise at Cape Royal

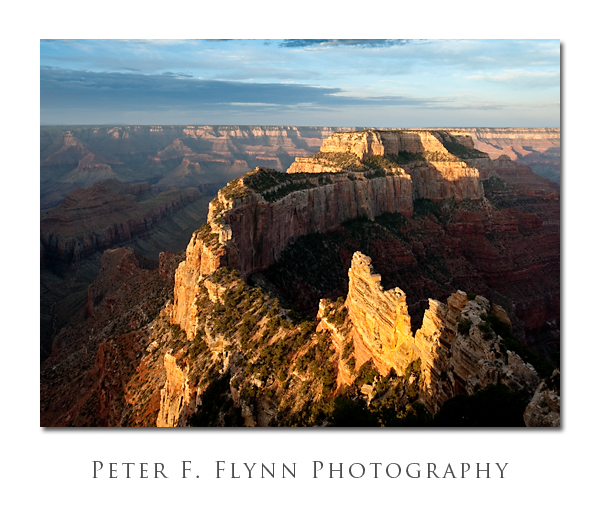
Well, here we are at Cape Royal, north rim of the Grand Canyon – that’s CAPE ROYAL of GRAND CANYON fame folks – and it’s just me, the HP, and the rising sun!!!  It’s as close to real magic as we get to experience…

Cape Royal is a bit further from Bright Angel Lodge and the north rim campground – and thus stalking the dawn is a little more challenging.  Still, is it really that much harder to get up at 4:30 than at 5?  I guess the evidence indicates that it must be…   From the North Rim (Bright Angel) Lodge – travel about 3 miles north on AZ 67 to the junction with Fuller Canyon Road.   Turn right, and travel along Fuller Canyon Road (northeast, then southeast) five miles to a second junction with the Point Imperial Road and the Cape Royal Road.  Turn right at the junction, and travel about fifteen miles southeast along the Cape Royal Road past several excellent view points to road’s end at the humongous parking lot.  The Angels Window view point is off to the east about 600 meters from the most opportunitistical parking spot, while the Cape is about 200 meters further down the flat paved trail (about 0.6 miles total from parking space to the overlook).

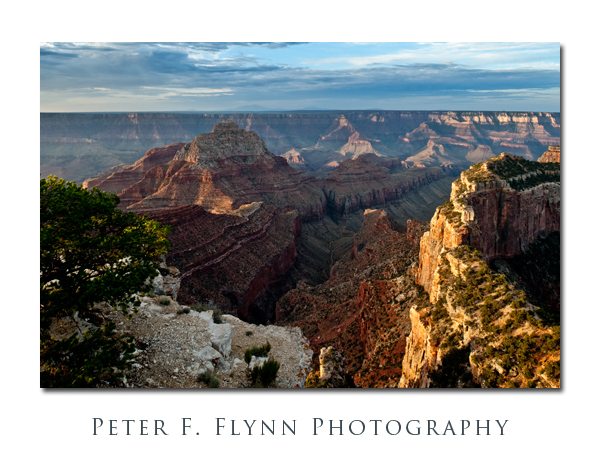
The image above was recorded on July 20, 2009, at 06:50 (MST), using the Nikon D700 and the PC-E NIKKOR 24mm f/3.5D ED.  The lens shift was about 10mm (lowered).  Exposure was f/22 and 1/8s.  ISO was 200.  Simple processing on this shot – just applied the Overlay Move using the blue channel to improve contrast in the cloud (a little).  This was one of those situations in which all you have to do is capture the light.  The image is dominated by the oft photographed Wotan’s Throne.  BTW, Wotan’s Throne is a game capture both at sunrise and at sunset (likely to be crowded at the latter).

The image below was shot at the same location, panning just slightly westward to include the Vishnu Temple, and beyond it, the south rim.  The image was recorded at 07:00 using the D700 and the 24mm PC-E.  Exposure was f/22 at 1/8s.  ISO was set at 200.

Vishnu Temple at Sunrise

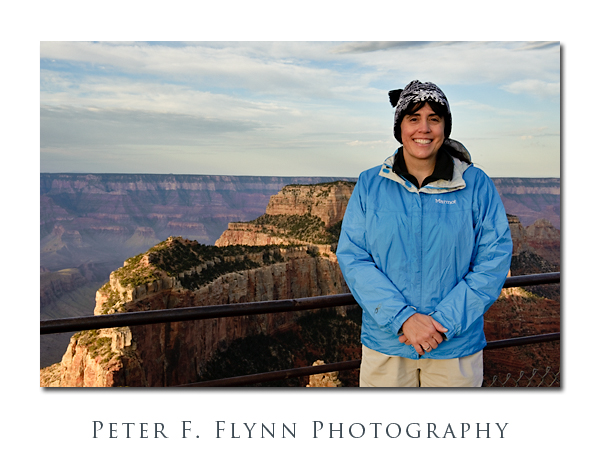
And let’s not forget to include a shot of the HP!

The HP at Cape Royal

The GPS coordinates of Cape Royal are:

Latitude:  36,7.0315N

Longitude:  111,56.925W

Altitude: 2397 m (7864 ft)

Time Stamp:  7/20/2009, 12:56:48 PM

Check on the thumbnail below for a Google Earth image of the vicinity:
Cape Royal Google Earth

Showdown at Wildwood

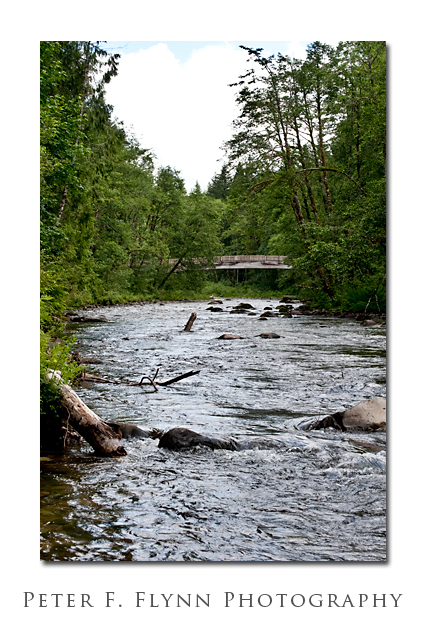
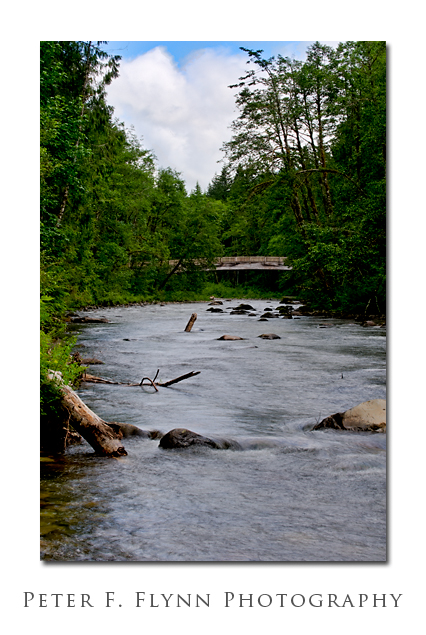
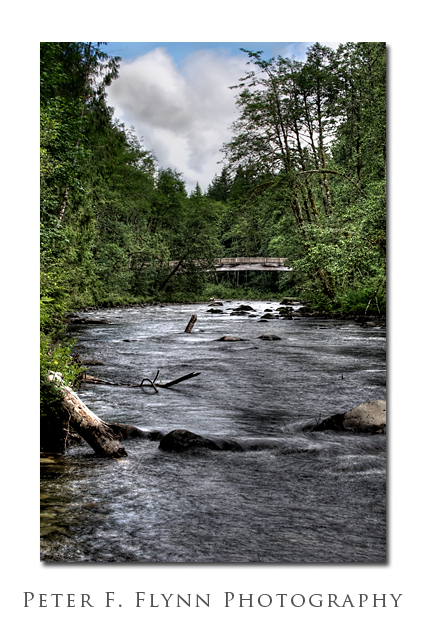
Blame it on the summer sun…  Yeah, it creates all this dynamic range in the luminosity that we have to deal with.  I know that I’ve been (over)-emphasizing HDR stuff lately, but I had to do one more entry on the HDR – or maybe I’ll do a bunch more, I don’t know yet!  Anyway, I decided to do a comparison and see how it all shakes out in a more or less  challenging but representative image.  So, dear friends, here we go, first with a standard image with best-effort-in-about-one-minute processing; an HDR image generated using Tone Compressor mode; and an HDR image processing using the Detail Enhancer…

Standard Processing

Standard Processing

HDR Tone Compressed

HDR Tone Mapped

HDR Detail Enhanced

HDR Detail Enhanced

Processing on the standard image consisted of basic adjustments in ACR,  including refinements in Exposure, Recovery, Fill Light, Blacks, and Clarity.  For the Tone Compressed image I applied the Overlay move to further enhance detail in the highlight (clouds).  In the Details Enhanced image I had to blend the image with the results of the post-conversion processed version of  the Tone Compressed image to reduce a very strong dark halo effect in the clouds.

The standard image is about all we could hope for given the scene and time-of-day.  There is good detail in the river and in the greenery, but of course the sky and clouds are completely gone.  In the Tone Compressed image these problems are eliminated.  Perhaps the greenery is a bit over-saturated, but when did we ever complain that the color is too strong – we can easily reduce this if desired.  I like what happens with the water too – a natural result of combining several images recorded using different shutter speeds.   The detail in the clouds is even better with the Details Enhanced image, and here if anything, the greenery seems a little under-saturated.  I also like the water here – maybe even better than in the Tone Compressed image.

The source images were recorded on June 19 at 13:30 PST, at the Wildwood Recreation Site, just east of milepost 39 along Oregon Highway 26.  I used the Nikon D700 with the AF-S VR Zoom-NIKKOR 70-300mm f/4.5-5.6G IF-ED lens at 70mm.  Exposures were f/18 at 1/250s, 1/160s, 1/100s, 1/60s, 1/40s, 1/25s and 1/15s.  ISO was set at 200.  White balance set to Auto.

Detail Enhancer settings:

Luminosity:  0

Strength:  100

ColorSaturation:  46

WhiteClip:  5.000000

BlackClip:  5.000000

Smoothing:  High

Microcontrast:  10

Microsmoothing:  0

Gamma:  1.000000

HighlightsSmoothing:  0

ShadowsSmoothing:  0

ShadowsClipping:  0

ColorTemperature:  0

SaturationHighlights:  0

SaturationShadows:  0

Tone Compressor settings:

Brightness:  3

Compression:  4

Contrast:  2

WhiteClip:  0.000000

BlackClip:  0.000000

ColorTemperature:  0

Saturation:  0

Painted Hills

Painted Hills

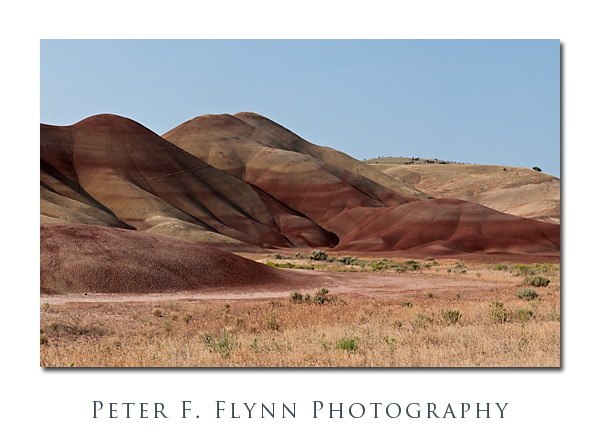
The John Day Fossil Beds National Monument in central Oregon consists of three separate sites: the Sheep Rock unit, the Clarno unit, and the Painted Hills unit.   The Painted Hills unit is located about 75 miles east of Bend, OR, just off of  highway 26, near Mitchell, OR.  The official National Park Service website for the site suggests that ‘The yellows, golds, blacks, and reds of the Painted Hills are best seen in the late afternoon.’  Maybe, but I kinda doubt it.  The morning light is good here – the contrast is high and the dispersion due to the humidity is low.  There are also mid-height hills west of the site that will steal the later afternoon light.  Come here, spend a day , and judge for yourself.  All in all it’s a pleasant site, but there is  is one thing.  Fences, everywhere…  When is the last time you saw a fence in a National Park or Monument?  Given the remoteness of the site, it’s frankly quite hard to believe that it’s all necessary…

The image above, of the Painted Hills, was liberated from the photon-dungeon around mid-May, 2009, but was originally recorded at 07:20 PST on July 20, 2008, using the Nikon D300 and the AF-S DX NIKKOR 16-85mm f/3.5-5.6G ED VR at 50mm.  Exposure was f/18 at 1/100s.  ISO was set at 200 (default).

The image is a crop from a panorama generated using a series of 16 images, overlapping by ~30%.   The stich was created using AutoPano Pro.  The resulting composite image was processed to enhance both color and contrast. The image was initially corrected for color balance (no WhiBal).  The contrast was then enhanced by copying the background layer to a background copy layer, changing the blending mode of the copied layer to ‘luminosity’ (contrast only).  The blue channel was applied to the red channel to enhance contrast in the hill, at an opacity of about 50% to maintain some darkness in the sky.  A curve was applied to the red the green channels to enhance contrast. Color in the image was enhanced by copying the (previously flattened) background layer, and carrying out what Dan Margulis has quite correctly named the ‘Overlay Move’.  A number of folks have sorted this out, including an excellent video presentation that Margulis worked up for the Kelby training series.