Posts Tagged ‘infrared photography’

Mesa Arch

Mesa Arch is located in the Island in the Sky district of Canyonlands NP.  The arch is accessible via a short, relatively flat 0.5 mile hike from the parking lot adjacent to SR313.  The parking lot is near the junction of roads leading northwest to Upheavel Dome and south towards Grand View Point Overlook, about ten miles inside the park on SR313.  Mesa Arch is easily one of the most photographed natural arches in the world.  Based on our three or four visits to the arch, I’d estimate that your mean time alone here is perhaps two minutes – no kidding.  If you want to photograph Mesa Arch without also including your fellow beings (who are posing for their own photos), you have to be patient and act fast.  The classic image is of the arch at dawn, with light streaming in from underneath.  There are hundreds of virtually identical images posted on the web.  All quite serviceable, but nevertheless subtle variations on a single theme.  Unlike the many relatively smooth forms found in Arches NP, Mesa Arch has a distinctly rough surface, and this is what I wanted to emphasize in this set of images.
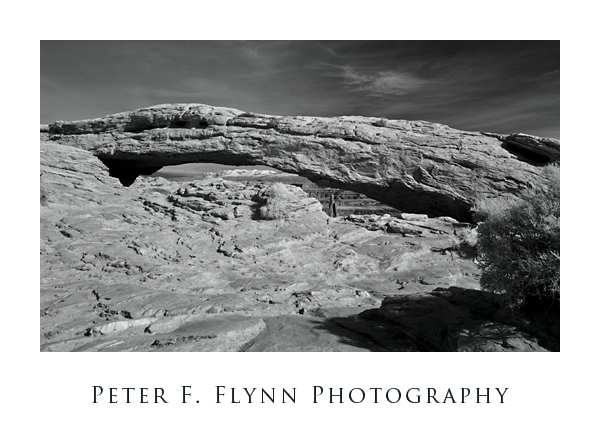
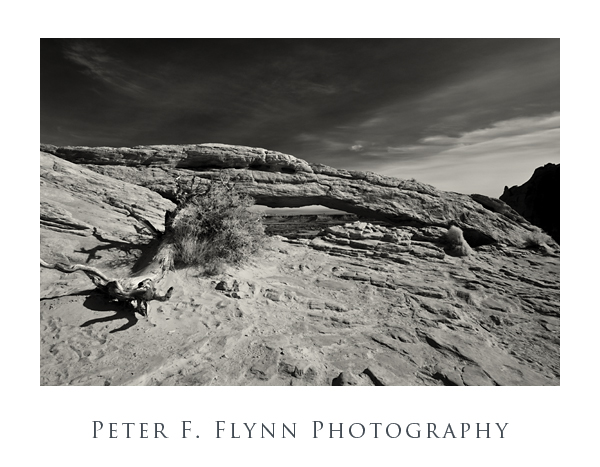
Mesa ArchThe IR image above, looking west through the arch to the La Sal Mountains and Shafer Basin was recorded on February 15, 2009 at around 15:00 MST using the Nikon D200IR (see the March 6, 2009 entry for details) and the AF-S  DX Zoom NIKKOR 12-24mm f/4 IF-ED lens at 18mm.  Exposure was f/16 at 1/20s, ISO 100.

The arch is perched on the edge of the mesa, overlooking Buck Canyon about 1000 feet below.  As I’ve mentioned in a previous entry, if arches earned their name from their function, this one would be named ‘walked-on arch’.
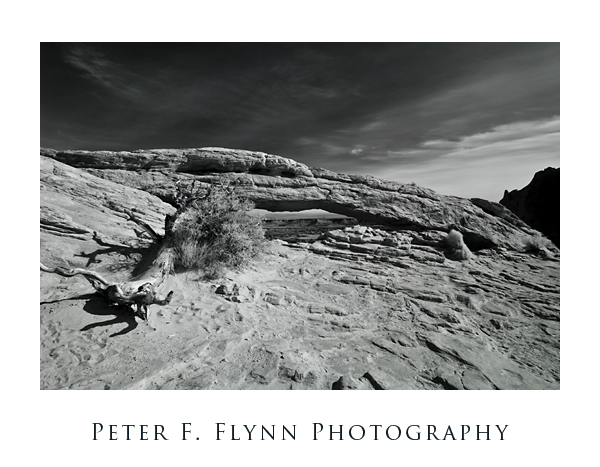
Mesa ArchThe image above; looking west-southwest, was recorded using the Nikon D200IR and the AF-S  DX Zoom NIKKOR 12-24mm f/4 IF-ED lens at 12mm.  Exposure was f/16 at 1/25s, ISO 100.  The image below is identical the one shown above, apart from application of a coffee tone.  Toning was applied using Nik Silver Efex Pro.  I am partial to the coffee-toned image, but wonder whether it might be over-the-top.  Comments appreciated.
Mesa Arch

Beyond 830nm

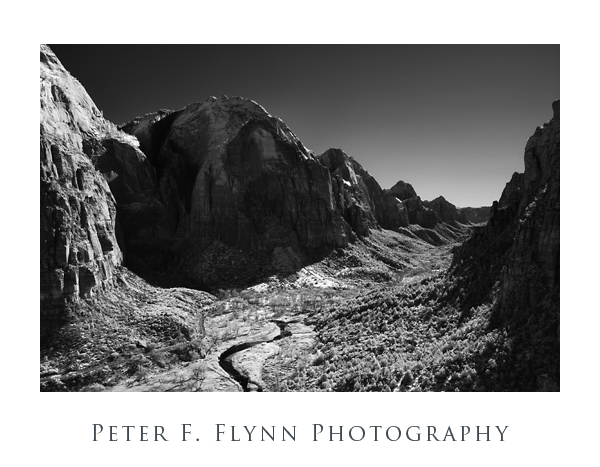
One of the frustrations of the hyperactive shutterbug (me) is what to do with yourself after and before the ‘magic hours’, e.g., an hour or so after sunrise until an hour or so before sunset.  My answer:  near infrared (IR) photography.  Apart from special circumstances (including desperation), we would normally avoid shooting images with the sun directly overhead, but it turns out that this is the optimal time for recording (IR) images.  The images included in this entry demonstrate the absence of haze and rich tonality that attracts folks to the approach, but do not include any really vivid examples of Wood Effect, in which greenery acquires curiously light tones due to the reflection of IR light from foliage.  It’s Utah in the dead of winter, there is no foliage!

Zion CanyonThe image above, looking south down the canyon of Zion NP was recorded on January 18, 2009 at around 15:40 MST using the Nikon D200 converted to IR capture (see below) and the AF-S  DX Zoom NIKKOR 12-24mm f/4 IF-ED lens at 24mm.  Exposure was f/16 at 1/13s, ISO 100.
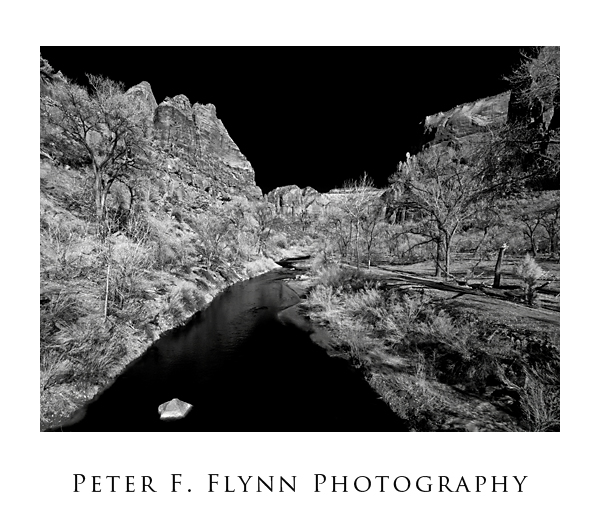
Virgin River & Zion CanyonThe image above of the Virgin River in Zion Canyon NP was recorded on January 18, 2009 at around 13:50 MST using the Nikon D200 converted to IR capture (see below) and the AF-S  DX Zoom NIKKOR 12-24mm f/4 IF-ED lens at 18mm.  Exposure was f/16 at 1/40s, ISO 100.
There are several ways to gear up for IR photography, and the method I chose was to send in my underused Nikon D200 digital SLR for IR conversion.  Digital sensors have high sensitivity to electromagnetic energy all the way from below 400 nm to about 1200 nm.  To avoid all sorts of trouble, an IR filter is placed over the sensor to block IR infiltration on the image.  IR conversion involves replacing the IR filter with a visible light filter.  The two most popular filters have visible light cut-offs at either 720 nm; which allows a bit of visible light (red) to pass through, like the Wratten 89B filter; or 830 nm, which renders a black and white image with greater contrast and tonal range than you can obtain with the 720 nm rig.  I chose the 830 nm filter set up, which is approximately equivalent in frequency response to the Kodak Wratten 87C  filter.  The conversion was done by Life Pixel Infrared Conversion Services*, of Mukilteo, WA.  It’s not particularly cheap at $375, but the folks at Life Pixel did an excellent job – no apparent dust left on the sensor during conversion and they also set a custom white balance.  All-in-all I believe it is an excellent value.  The turn around time for the conversion was about ten days.

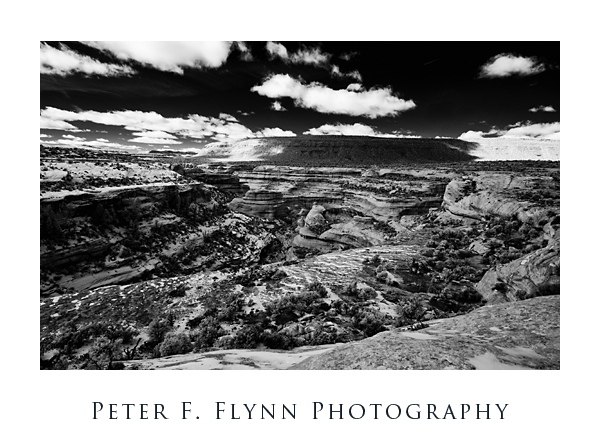
Kachina Bridge in IRThe image above of Sipapu Bridge in Natural Bridges NM was recorded on February 14th, 2009 at about 13:30 with the Nikon D200IR and the AF-S  DX Zoom-NIKKOR 12-24mm f/4 IF-ED lens at 18mm.  Exposure was f/16 at 1/13s, ISO 100.

There are a number of excellent photographers working in the IR.  Included are:

Reha Akcakaya : http://rehaakcakaya.com/

Stephen R. Brown:  http://www.srbphoto.com/infrared/index.html

Kenneth Farmer:  http://www.infraredvideo.com/

Laurie White Hayball

Cyrill Harnischmacher

Chris Maher# http://dreamsofthegoddess.com/

Joeseph Paduano:  http://www.joepaduano.com/

Fredrik Rasmussen:  http://www.momentcorp.com/

Martin Reeves:  http://www.thehiddenrealms.com/

Patrick Rice: http://www.ricephoto.com/abtpatrick.htm

The following websites are also worth visiting:

Digital Photography For What It’s Worth:  http://www.dpfwiw.com/ir.htm

Infrared Photography Buzz:  http://irbuzz.blogspot.com/

Infrared Photography Forum:  http://www.irphotoforum.com/

…and there’s a lot more out there…

*I am directing you to the image comparison page to avoid the very informative but slightly annoying voice-over index page.

#Some nudity, but tasteful.

Dead Horse Point

Dead Horse Point State Park is adjacent to the Island in the Sky District of Canyonlands NP, about 18 miles south on SR313 from the junction with US191 (15 mile southeast of Moab as the crow flies).   The road out to Dead Horse Point Overlook passes through a narrow (30 ft) wide section know as The Neck that connects the point to the rest of the mesa.  Cowboys herded wild mustangs by driving them through the narrow passage which was then closed by a fence.  The name of the park is attributed to the death by dehydration of a herd of horses that were left on the point.

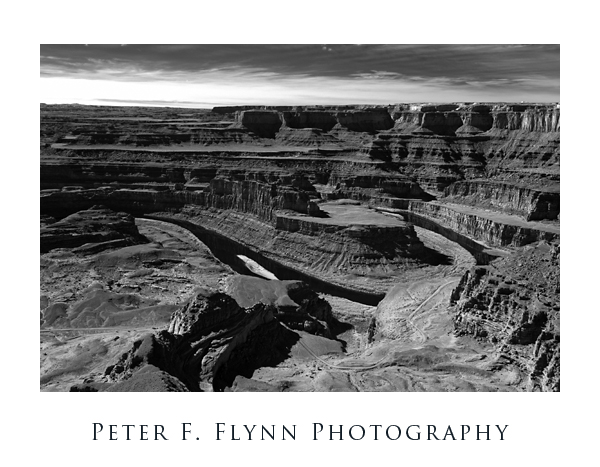
Colorado River from Deah Horse Point

A rim trail circumnavigates the point, providing a number of excellent viewpoints, including the Pyramid Canyon Overlook at the north end of the park; the Visitors Center overlook; the Basin Overlook about 0.5 miles south of the Visitor’s Center; Dead Horse Point Overlook at the southern tip of the point/park;  Meander Overlook  just west of The Neck; Shafer Canyon Overlook, which is about 1.5 miles north on the rim trail from Meander Overlook; Rim Overlook, approximately 1 mile north of the Shafer Canyon Overlook; and  Big Horn Overlook about 2 miles north on the rim trail from the Rim Overlook.

The IR image of the Colorado River from the Dead Horse Point Overlook was made at about half past noon on February 15, 2009, using the Nikon D200IR and the AF-S Zoom-NIKKOR 12-24mm f/4G IF-ED at 24mm.  Exposure was f/16 at 1/20s, ISO 100.