It’s All About f/8.0

Today Nikon released a firmware upgrade for the D4 (A:1.02/B:1.02).  This is the third firmware upgrade for the D4, following releases on July 4 and May 29 (2012).  Curiously, the official comment from Nikon on the feature enhancement addressed by the upgrade is:

Focus accuracy when a lens and teleconverter with a combined maximum aperture of f/8 is used has been increased.

That’s it, no bug fixes, no other ‘modifications enabled’, just the f/8.0 thing.

This release seems clearly targeted at the 800mm f/5.6 Nikkor lens that was announced in July.  Back on July 14, I wrote a few lines about about this lens, and pointed out that fitting the 800mm f/5.6 with the 1.4X tele gets you 1120mm at f/8.0, whereas with the 600mm f/4.0,  one could go with the 1.7X tele and get 1020mm at f/6.7, or go with a 2.0X tele and get 1200mm at f/8.0.

There’s that f/8.0 again.

But I don’t wanna shoot at f/8.0…

Find the D4 firmware upgrade at the following URL:

http://support.nikonusa.com/app/answers/detail/a_id/18061/kw/d4

Copyright 2012 Peter F. Flynn.  No usage permitted without prior written consent. All rights reserved.
iPhoto/iPad Slideshow Order Solution

Anyone who has tried using iPhoto on the iPad to produce a simple slideshow understands the frustration of setting up the precise order of images.  It appears that some folks employ a workflow that dodges the problem, but it is clear that the slideshow feature does not employ a simple intuitive interface for ordering the images.

Enough of the problem, let’s get to the solution.  Note that the following protocol applies to images sync’d to the iPad using iTunes.

The approach is simple, but some may find it a little tedious.  We do this one by the numbers:

1) Open iPhoto

2) Along the top of the screen you will find, from left to right, buttons for Photos, Photo Stream, Albums, Places.  Select Albums.

3) Touch the + symbol in the upper left hand corner of the screen.

4) A dialogue box appears, with a prompt for the name of the new album.  Supply an appropriate title and touch the Save button.  We’ll use Test for this example.

5) The context shifts to the Photo area of iPhoto and thumbnails of all of the images stored on the iPad will appear.  The instruction, Add photos to “Test”. appears above the thumbnails.  Select the first image of the slideshow ( a check will appear on the thumbnail) and touch the Done button in the upper right hand corner of the screen.

6) A new album appears with the first image as the album image icon.

7) Touch the new album icon.  The title of the album appear along the top center of the screen.  To add the second image to the slideshow tough the Edit button in the upper right hand corner of the screen.  The butons in the upper right hand corner change to Add Photos and Cancel.

8) Touch the Add photos button.  The bank of image thumbnails appears.  Select (touch) the thumbnail of the second image that you want to add to the slideshow and touch the Done button in the upper right hand corner of the screen.  A check appears on the thumbnail.  Touch the Done button in the upper right hand corner of the screen.

9) The context shifts back to the album under construction.  You should now see thumbnails for the two images you have added to the new album.

10)  Repeat as necessary to generate a complete slideshow.

This is a simple but inelegant solution based on the use of iOS native applications, e.g., iTunes and iPhoto .  The order of images cannot be changed after the order has been set – except to trash the show and redesign it.  We are investigating alternative apps that will streamline this important process – stay tuned.

Cheers,

P.

Copyright 2012 Peter F. Flynn.  No usage permitted without prior written consent. All rights reserved.
Fall Color in Grand Teton NP

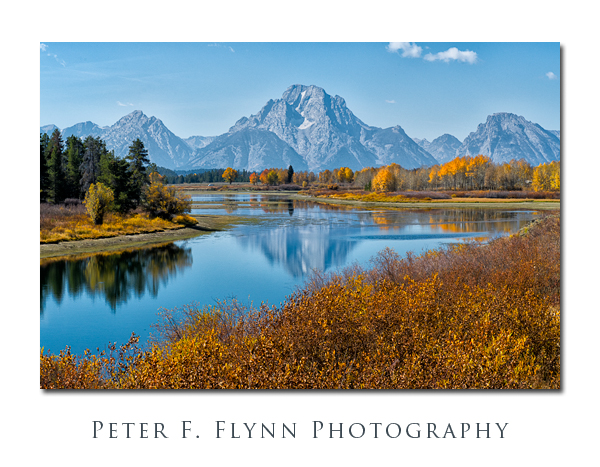
On the return from a late September visit to The Stone we passed through Grand Teton National Park.  Here we found the fall color fully developed.  Overall, color around the mountain west has been somewhat muted relative to last year, but one can still find pockets of pleasing intensity.

Trees and shrubs around the Willow Flats and Oxbow Bend area generally exhibit excellent color in season, and the contrast of fall color with the northern Tetons makes for respectable images.  The image above of Mount Moran from Oxbow Bend was recorded at 13:00 MST on September 30, 2012, using the Nikon D800E and the AF-S NIKKOR 24-70mm f/2.8G ED at 70mm.  Exposure was f/11 and 1/500s, ISO 500 (+0.33 EV, corrected using ACR).

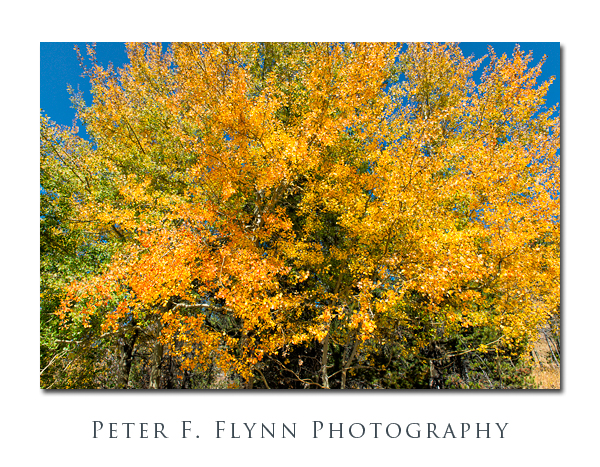
The image above was recorded just across the road (north side of the J.D. Rockefeller Jr. Pkwy) at the Oxbow Bend Turnout.  Exposure parameters as above.

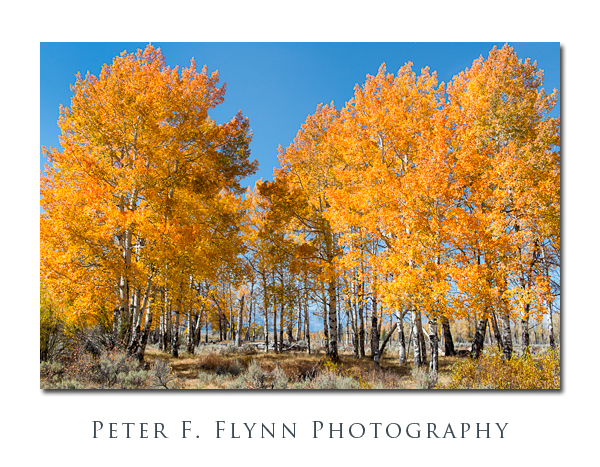
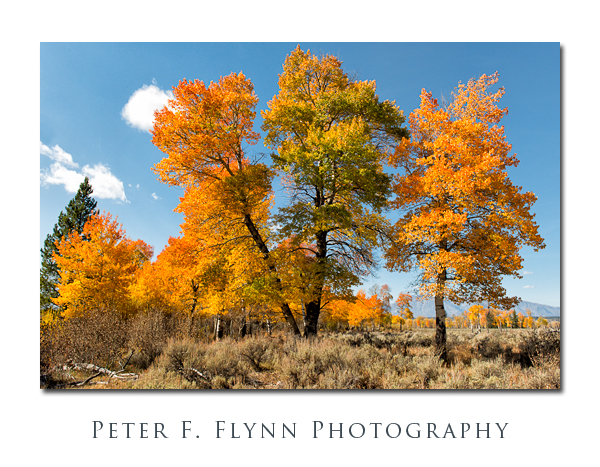
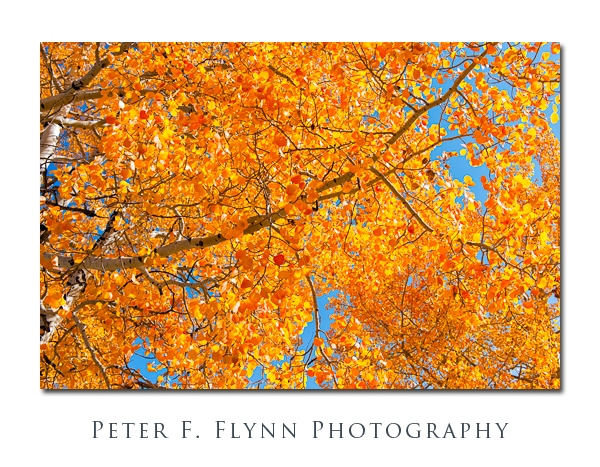
There are a number of little enclaves of fall color along the Teton Park Road (US 191/89), which is the mainline through the park.  One of my favorites is located near the turnoff to Moose Head Ranch.  There are several small clones/groves of aspen here that reliably produce good fall color.  The image above and the two images below were recorded at around 14:00 MST on September 30, 2012 using the Nikon D800E and the AF-S NIKKOR 24-70mm f/2.8G ED at a variety of focal lengths.  Exposures were at f/11 and 1/640s, ISO 800 (+0.33 EV, compensated using ACR).

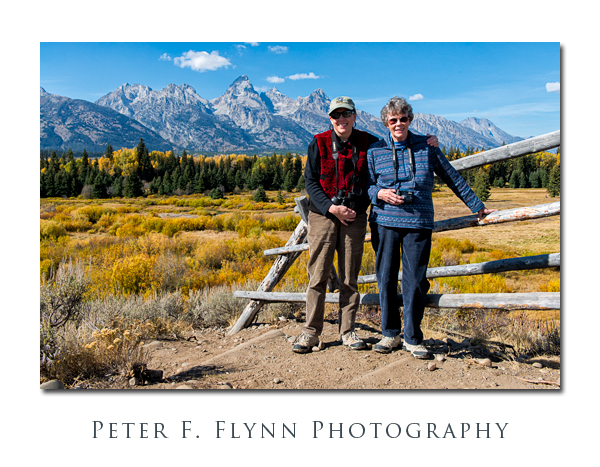
Finally below, a lovely shot of the HP and Dity (MOTHP) at the Blacktail Ponds Overlook.  The image was recorded at 14:44 MST on September 30, 2012 using the Nikon D800E and the AF-S NIKKOR 24-70mm f/2.8G ED at 32mm.  Exposure was at f/11 and 1/640s, ISO 800 (+0.33 EV, compensated using ACR).

Copyright 2012 Peter F. Flynn.  No usage permitted without prior written consent. All rights reserved.