Archive for the ‘Methods’ Category

Cisco, UT 84515

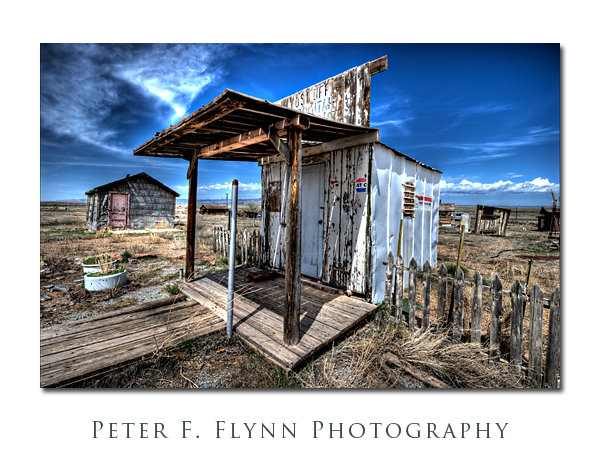
Cisco, Utah, was born during the late 19th century era of the steam engine, and became an important watering stop for the locomotives.  The railroad station became a key shipping center for the livestock that were managed in the open range country of the Book Cliffs.  Unfortunately, the diesel locomotive made stops at Cisco unnecessary, and by the 1950’s the long decline of the town had began.  Unlike Greenriver, which lies adjacent to I70, and which is an important stop for travelers, Cisco was left too far off of the freeway to gain significant commercial traffic.  Hard luck.

The image above, of the old Cisco post office, was recorded on April 18, 2010 at about 12:40 MDT, using the Nikon D3s and the (new) AF-S NIKKOR 16-35mm f/4G ED VR lens at 16mm.  Exposure was f/16 and 1/160s, ISO 400.  One RAW images was converted to HDR using Photomatix 3.1 ( see below for for processing details).

Regional guides list Cisco as a ghost town.  I’m not so sure, since while it certainly does have certain attributes of a ghost town, it has also been exploited as a junk yard – plenty of character to be sure, but for ghost town aficionados it’s most probably not the real deal.  Regardless of how you define it,  the place certainly is a great location at which to refine your High Dynamic Range photography (HDR) skills.   Light, dark, decrepit structures, old, abandoned cars, it’s all in there.  The circumstance lends itself most naturally to what I will name – without any judgment – fantasy HDR.  For you HDR aficionados, by ‘fantasy’, I mean to conjure up the effect one gets with (in Photomatix language) Detail Enhancer mode tone mapping conversion.  Of course we’ve all seen this effect, and there is tons of this stuff on the web – some of it is very nice.  I include links to a few of the more active HDR sites that describe Detail Enhancer mode strategies below:

http://www.aguntherphotography.com/tutorials/raw-hdr-processing.html

http://www.stuckincustoms.com/

http://www.vanilladays.com/gallery/tag/hdr/

http://www.robertcorrell.com/

The full Detail Enhancer mode specifications for this file are shown below:

Photomatix Version 3.1
Method: Details Enhancer
Luminosity: 5
Strength: 100
ColorSaturation: 88
WhiteClip: 5.0
BlackClip: 5.0
Smoothing: High
Microcontrast: 10
Microsmoothing: 2
Gamma: 1.0
HighlightsSmoothing: 0
ShadowsSmoothing: 0
ShadowsClipping: 0
ColorTemperature: 0
SaturationHighlights: 0
SaturationShadows: 0

Copyright 2010 Peter F. Flynn. No usage permitted without prior written consent. All rights reserved.
The Myth of the Golden Hour, Part IV

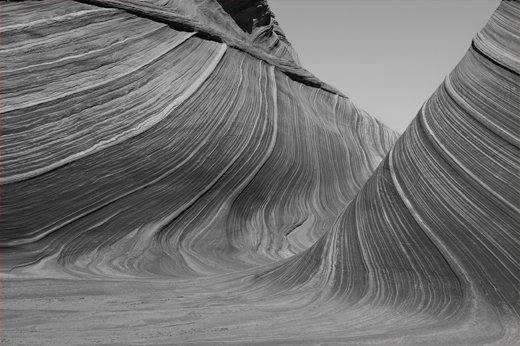
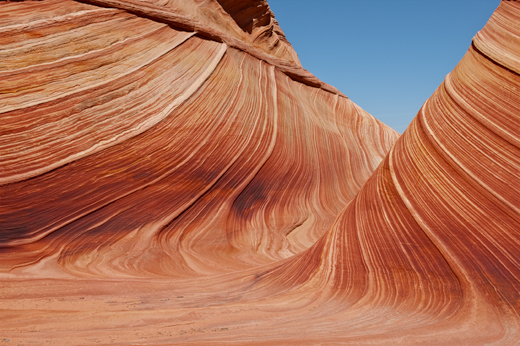
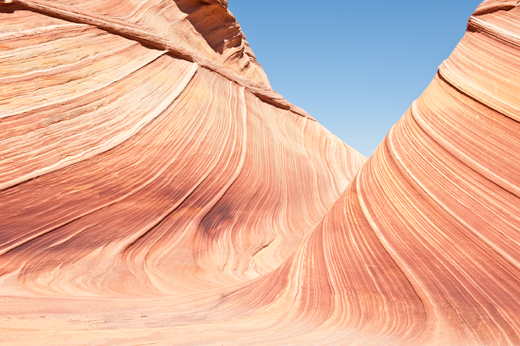
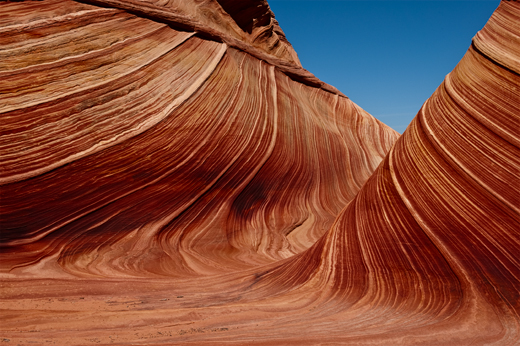
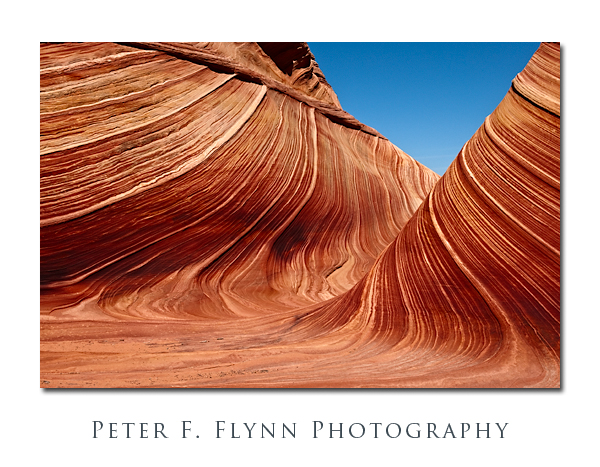
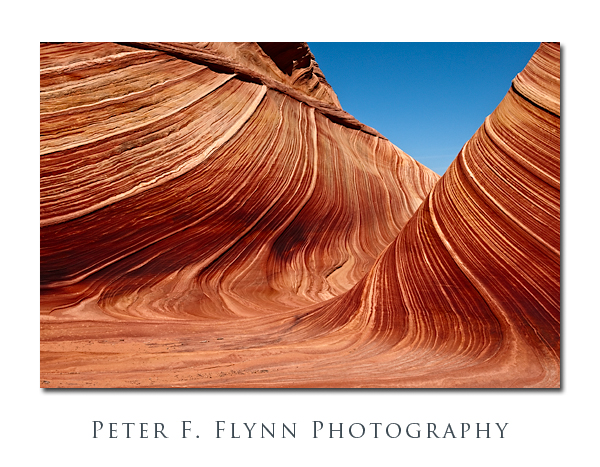
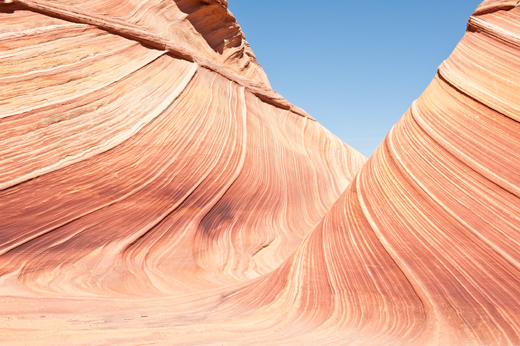
The image above was recorded in The Wave at about 12:20 MST on August 27, 2009, using the Nikon D700 and the AF-S NIKKOR 24-70mm f/2.8G ED lens at 45mm.  Exposure was f/16 at 1/250s, with an ISO of 200.  The Wave is found in the Coyote Buttes North section of Vermilion Cliffs National Monument in Utah/Arizona.

In a previous installment in this series I’ve indicated that the contribution to image contrast of the individual red, green, and blue channels are unequal.  In fact, the green channel contributes twice as much as the red channel, and the red channel contributes three times as much as the blue channel.  There are quite natural reasons for this curious channel weighting, which we will consider in a future entry.  For the current consideration we will focus on how we can modify the apparent weighting of the contributions of the individual R, G, and B channels.

The book says that an image recorded at midday is likely to be weak, e.g., lacking color saturation and contrast.  Admittedly, perhaps the composition is a bit ordinary, but there is nothing lacking in the image above in terms of image contrast and color saturation.  On the other hand, and as is shown below, that is not how this image started out.

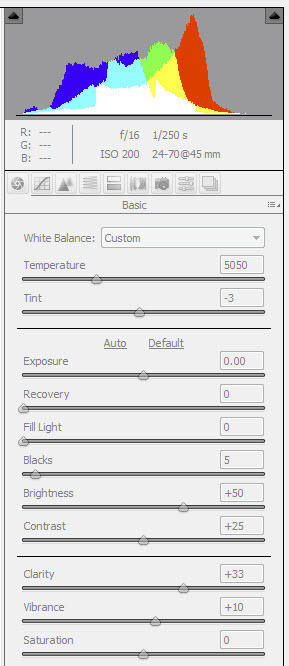
Well, this is obviously an overexposed image you might say.  Nope, check the histogram.

I bracketed this shot too, and this is the best compromise between overexposed and muddy.  The lack of contrast is a result of shooting the scene with the sun pretty much exactly overhead – what audacity!

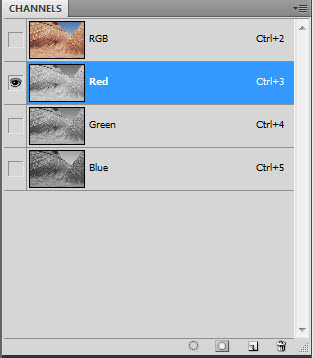
We appear to have quite a way to go to bring the source image to the final image, but it’s actually quite straightforward.  Begin by reviewing the red, green and blue channels of the source image.  First copy the Background layer, (cntl>j (<cmd>j on the Mac) to generate a new layer (Layer 1).  Then select the red, green, and blue channel panels in turn in the CHANNELS palette.

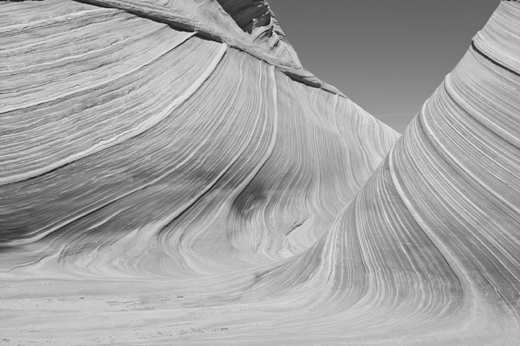
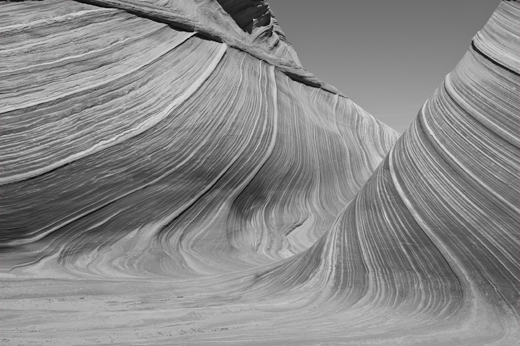
As you can clearly see below, the green channel possesses much better contrast than the red channel – this channel is in pretty good shape.

The blue channel (below) has much better contrast than the red channel.

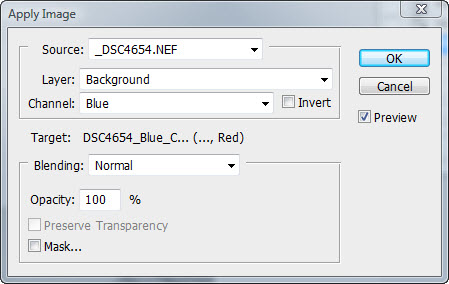
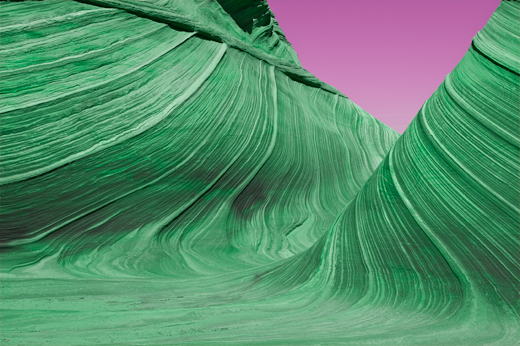
To enhance contrast in that weak red channel we simply replace the red channel (blend) with the blue channel.  To accomplish this replacement, we employ the Apply Image tool to execute the blend by first selecting the red channel, and then typing Image > Apply Image, and then specifying that the blue channel be added to the red channel in Normal blending mode at 100% opacity.  The result is shown below.

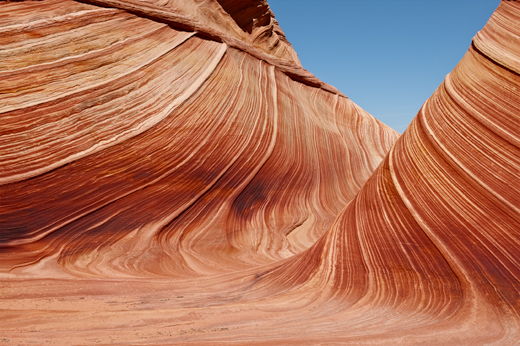
While you might be able to appreciate the contrast enhancement, the resulting influence on color dominates your impression.  We can restrict the influence of channel blending by changing the blending mode of the Background copy layer to Luminosity.  The result of the change in blending mode is shown below, with the original source image shown below that image for comparison.

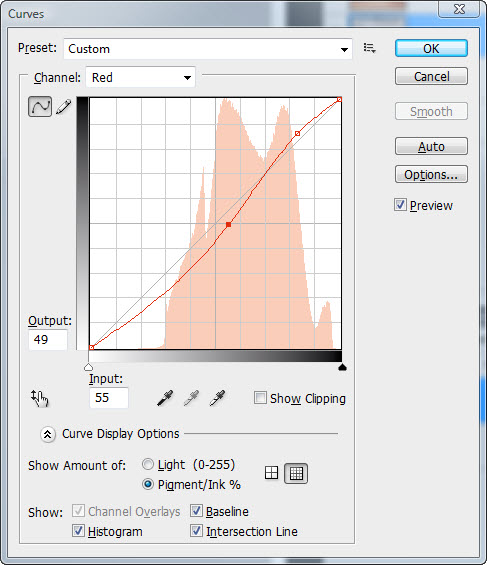
This is a significant improvement.  The contrast is then further enhanced by applying a curves adjustment to the red and green channels (you could also apply a curve to the blue channel, the influence on the overall image contrast would be small).

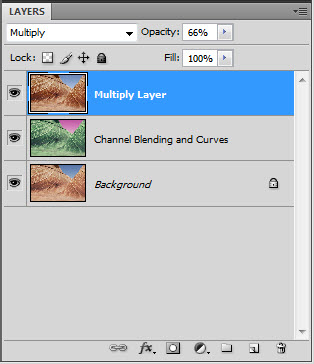
To finish processing of the image we apply the image to itself in Multiply blending mode by first flattening the image, and then copying the resulting layer and changing the blending mode to Multiply.

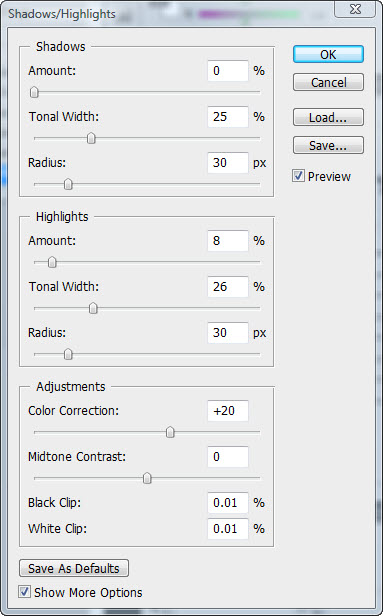
Finally, we apply Shadow/Highlight adjustment to open up the mid tone range a bit: select Image > Adjustments > Shadow/Highlights…

I hope that you’ve found this entry useful.  If so, please drop me a line and let me know what you’d like to see in future posts.  Cheers, P.

Copyright 2010 Peter F. Flynn. No usage permitted without prior written consent. All rights reserved.
A Moment in Time Recovered

Whether it’s a box of photos, or pages in an album, to a keen archivist it’s the challenge of the undiscovered country, a set of visions created by dear friends or relatives, to be rendered in modern digital terms.

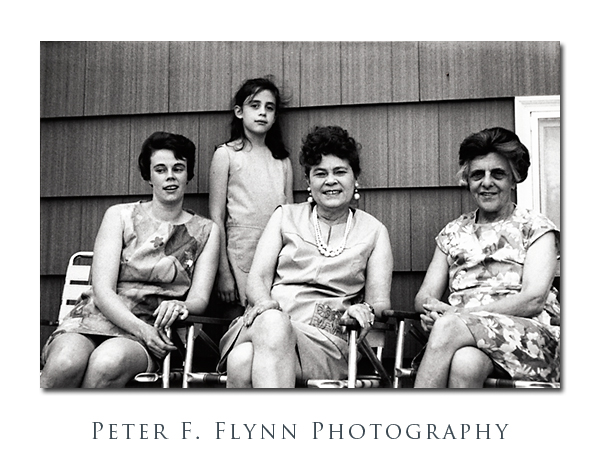
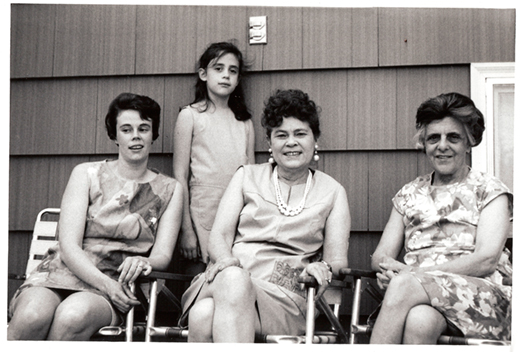
The image above represents three generations.  On the left is Meredith, her mother Helen in the middle, and her mother-in-law, Margaret, on the right.  Standing behind her mother and grandmothers is the HP as a young lady.  This is just an awesome composition, but what attracts me most to this image is the HP’s classic Mona Lisa smile, and those eyes.

My father in law, Carl J. (Joe), was an inspired shooter,  who has left his family with a great wealth of images.  Joe shot using a number of formats, including Kodak 126 format and and 35mm, with output rendered at the local photo mill standards of the time.  The image above was recorded using a Praktica 35mm camera.  The source image for the restoration, shown below, was a scan of the printed image generated using an HP ScanJet at 1200 dpi – yes, there are better scanners, but honestly, I’m not certain that they help much.

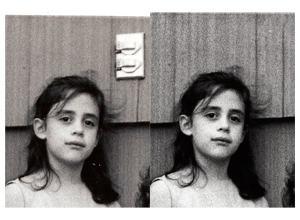
The image was scanned into RGB colorspace.  Contrast was enhanced by adding a curves adjustment to the individual red and green channels.  The image was then converted to BW,  and the contrast then further enhanced using Nik Silver Efex Pro.  Noise and dust were removed a combination of the Clone Stamp and Healing Brush tools in Photoshop CS4.  In practice I find that regions that have a constant tone are most efficiently repaired using the Clone Stamp tool, whereas the Healing Brush tool generally works better on regions that contain complex patterns.  In all cases, keeping the brush size as small as possible generally produces the most favorable results.

The heavy lifting in this image was the removal of an outdoor service outlet along the wall just above and to the right of the head of little HP.  I cloned in a replacement seam from the set of shakes that lies to the right of where that service outlet exists using the Clone Stamp tool.  Reasonably convincing if I do say so myself.

If you are serious about image recovery, there are a number of excellent published texts on the subject.  My current working texts are Scott Kelby’s ‘The Adobe Photoshop CS4 Book for Digital Photographers’,  Katrin Eismann’s (with Wayne Palmer) ‘Photoshop Restoration and Retouching’, and Ctein’s ‘Digital Restoration from Start to Finish, Second Edition: How to repair old and damaged photographs’.

Copyright 2010 Peter F. Flynn. No usage permitted without prior written consent. All rights reserved.