Archive for the ‘National Parks and Monuments’ Category

The Myth of the Golden Hour, Part IV

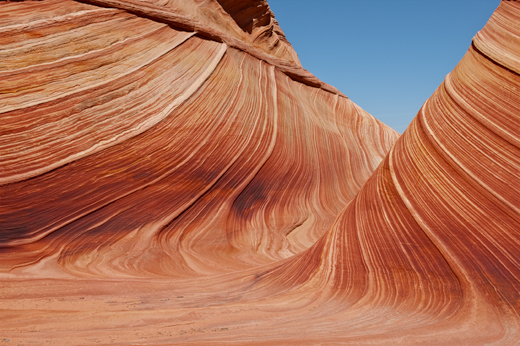
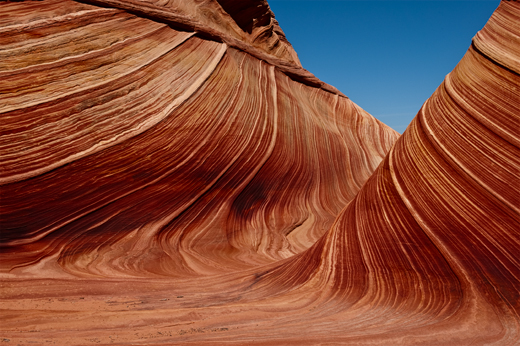
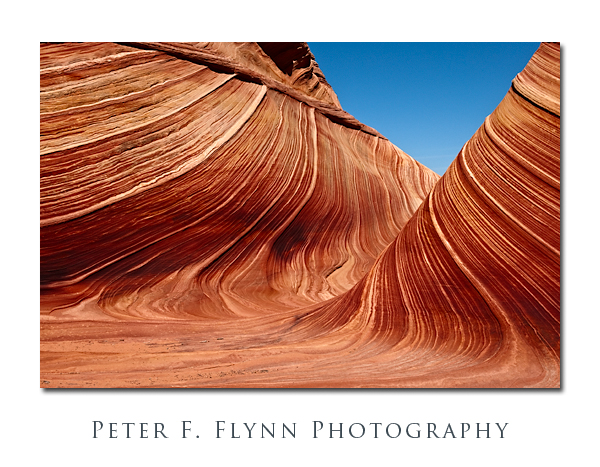
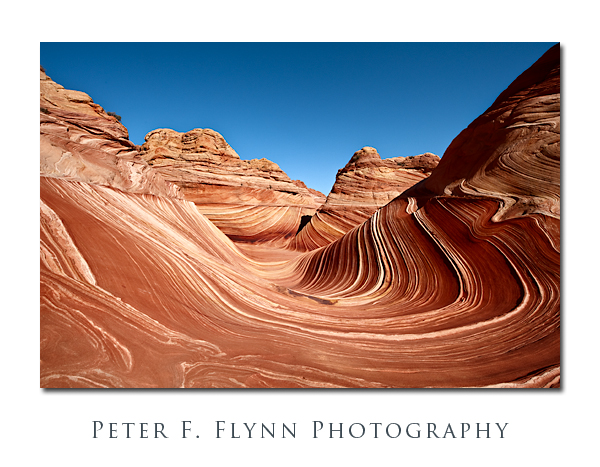
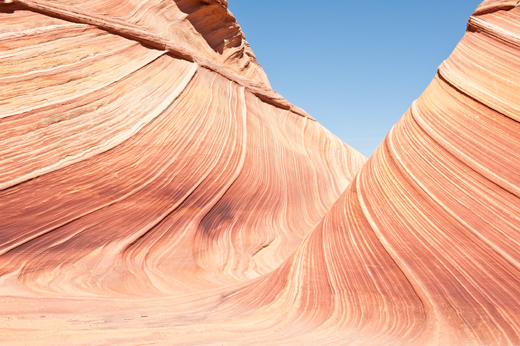
The image above was recorded in The Wave at about 12:20 MST on August 27, 2009, using the Nikon D700 and the AF-S NIKKOR 24-70mm f/2.8G ED lens at 45mm.  Exposure was f/16 at 1/250s, with an ISO of 200.  The Wave is found in the Coyote Buttes North section of Vermilion Cliffs National Monument in Utah/Arizona.

In a previous installment in this series I’ve indicated that the contribution to image contrast of the individual red, green, and blue channels are unequal.  In fact, the green channel contributes twice as much as the red channel, and the red channel contributes three times as much as the blue channel.  There are quite natural reasons for this curious channel weighting, which we will consider in a future entry.  For the current consideration we will focus on how we can modify the apparent weighting of the contributions of the individual R, G, and B channels.

The book says that an image recorded at midday is likely to be weak, e.g., lacking color saturation and contrast.  Admittedly, perhaps the composition is a bit ordinary, but there is nothing lacking in the image above in terms of image contrast and color saturation.  On the other hand, and as is shown below, that is not how this image started out.

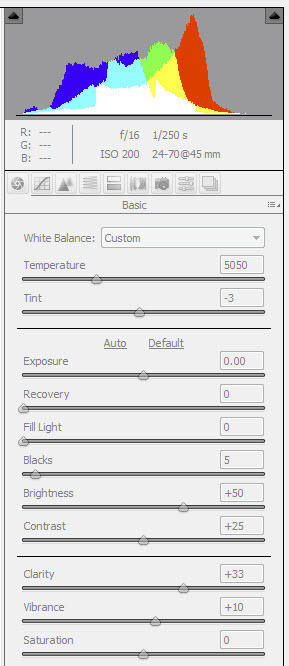
Well, this is obviously an overexposed image you might say.  Nope, check the histogram.

I bracketed this shot too, and this is the best compromise between overexposed and muddy.  The lack of contrast is a result of shooting the scene with the sun pretty much exactly overhead – what audacity!

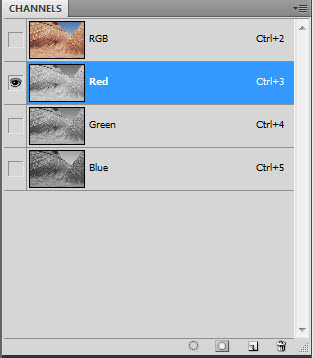
We appear to have quite a way to go to bring the source image to the final image, but it’s actually quite straightforward.  Begin by reviewing the red, green and blue channels of the source image.  First copy the Background layer, (cntl>j (<cmd>j on the Mac) to generate a new layer (Layer 1).  Then select the red, green, and blue channel panels in turn in the CHANNELS palette.

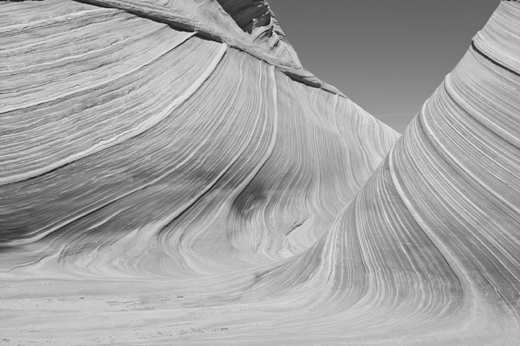
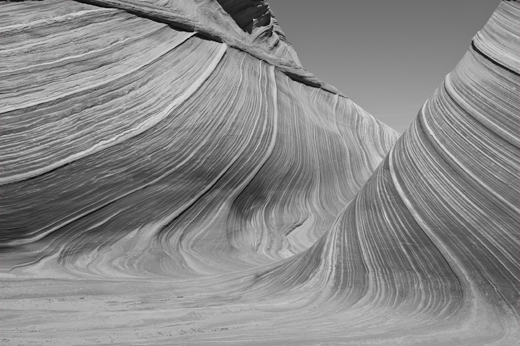
As you can clearly see below, the green channel possesses much better contrast than the red channel – this channel is in pretty good shape.

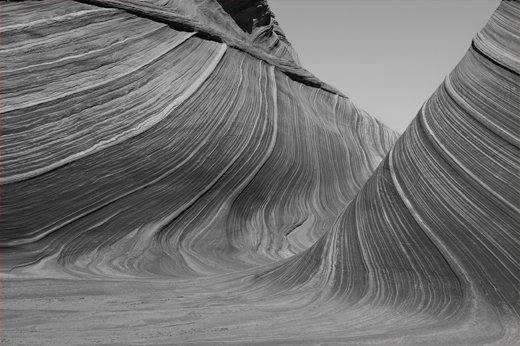
The blue channel (below) has much better contrast than the red channel.

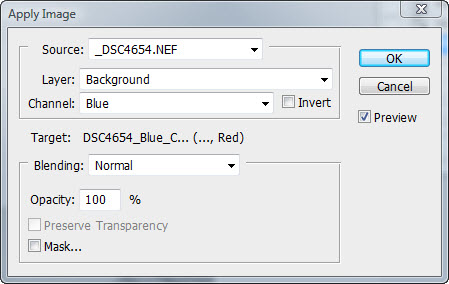
To enhance contrast in that weak red channel we simply replace the red channel (blend) with the blue channel.  To accomplish this replacement, we employ the Apply Image tool to execute the blend by first selecting the red channel, and then typing Image > Apply Image, and then specifying that the blue channel be added to the red channel in Normal blending mode at 100% opacity.  The result is shown below.

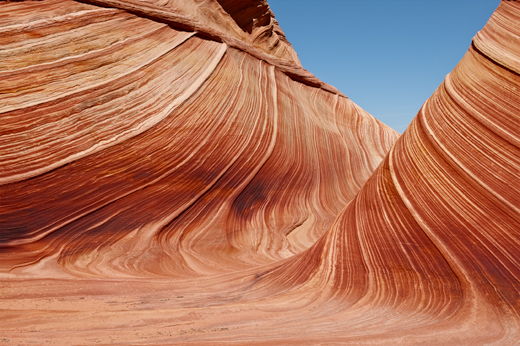
While you might be able to appreciate the contrast enhancement, the resulting influence on color dominates your impression.  We can restrict the influence of channel blending by changing the blending mode of the Background copy layer to Luminosity.  The result of the change in blending mode is shown below, with the original source image shown below that image for comparison.

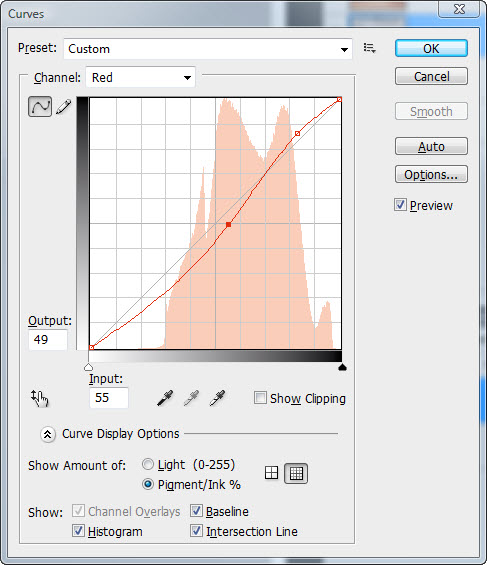
This is a significant improvement.  The contrast is then further enhanced by applying a curves adjustment to the red and green channels (you could also apply a curve to the blue channel, the influence on the overall image contrast would be small).

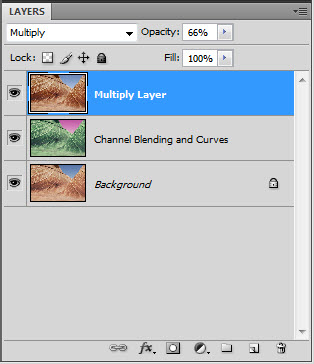
To finish processing of the image we apply the image to itself in Multiply blending mode by first flattening the image, and then copying the resulting layer and changing the blending mode to Multiply.

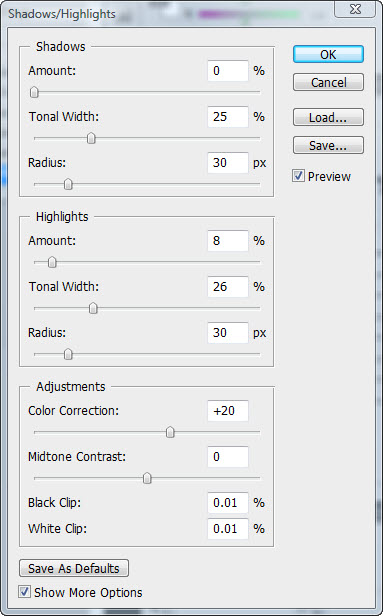
Finally, we apply Shadow/Highlight adjustment to open up the mid tone range a bit: select Image > Adjustments > Shadow/Highlights…

I hope that you’ve found this entry useful.  If so, please drop me a line and let me know what you’d like to see in future posts.  Cheers, P.

Copyright 2010 Peter F. Flynn. No usage permitted without prior written consent. All rights reserved.
The Wave Experience

If you follow photoblogs like this one at all, you will certainly have heard of ‘The Wave’.  I’ll argue that it’s not just a place, but more of an experience sort of thing.  Among other things, it is an adventure….

For many, the adventure begins with the quest for a permit.  The Wave is part of a specially designated section of Vermillion Cliffs National Monument known as Coyote Buttes North, and legal access requires you to obtain a permit.  Permits are available through an online application , however the competition for these is fierce.  The only option for many folks is to show up at the BLM Paria Contact Station by 9 AM (that’s Utah time) to participate in the permit lottery.  The ranger station opens at 8:30 AM and the rangers accept applications from the hopefuls, of which there typically 30+.  At 9 AM a bingo cage is set up and loaded with tokens for each application.  Note that permits corresponding to 10 persons total will be awarded – the actual number of permits released depends on the number of people in each of the successful groups.

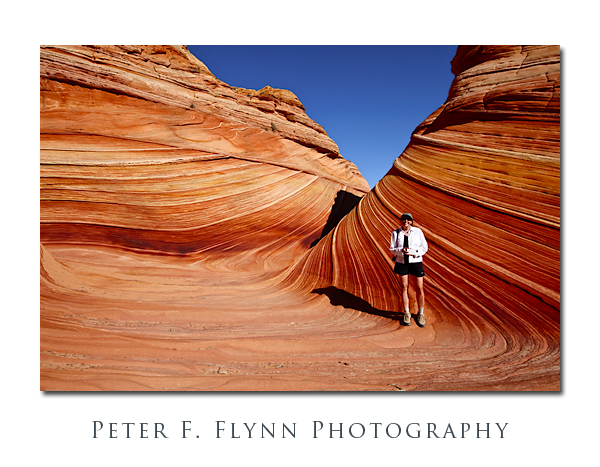
The image above, of the HP in The Wave, was recorded at 09:53 MST on August 27, 2009, using the Nikon D700 and the AF-S NIKKOR 14-24mm f/2.8G ED lens at 17mm.  Exposure was f/16 at 1/200s, ISO 200.  One of the most surprising features of The Wave is just how small it is – maybe 100 meters square or so.  For this reason, although I am usually solidly against any sort of restrictions on access, I gotta go along with the permit system.

The date was August 26, 2009.  The room of literally full of people, a good fraction of whom are returnees from the previous day.  The HP and I were number 6.  The cage rolls, and a number chosen.  Is that 6 or 9?!!!  You gotta be kidding…6…we win on the first draw!  All those years of practicing good karma have finally paid off.  Now we can relax and see how the rest plays out.  Quite a lot of tension I must admit – resolved in the end into a mixture of joy and disappointment.  The odds are against you, and it’s a bit of a stunned feeling to be among the lucky few with winning numbers.  You have the rest of the day to contemplate your good fortune, since the permit is actually valid for the following day.

If it’s summer, and the weather is seasonal, you had better get an early start.  You will be in the open on sand or sandstone the entire day, and there is no shade anywhere.  Yeah, I suppose you could lay on the ground under a juniper bush, but that is just plain undignified.  No matter how prepared you think you are, I can assure you that you are inadequately prepared.  The rangers advise one gallon of water per person or the day.  Seems like a lot you are thinking… If you bring that much you will return to your car feeling like you are dying of thirst – if you bring less, you may actually be.  No joke, this place is as potentially deadly as it is beautiful.  Depending on your pace, it will take you between an hour and two hours to reach The Wave.  The final stretch takes you up a steep sandstone face that is covered with sand, and the tough going guarantees that you will need a short rest before you enter The Wave proper.

The image above, of the main body of The Wave, was recorded at 10:17 MST on August 27, 2007, using the Nikon D700 and the AF-S NIKKOR 14-24mm f/2.8G ED lens at 15mm.  Exposure was f/16 at 1/200s, ISO 200 (-0.67 EV).  This shot was made from a position a bit deeper into the main body than the previous shot that includes the HP (or maybe it should now be The HP).

I will divide The Wave into six areas; the antechamber, the main body, the grandstand, the cheapseats, the Wave2, and the backrooms.  As suggested by its name, the antechamber is the entrance to The Wave, and is among the most exciting parts of  The Wave experience.  It’s not just that it comes first, although that is clearly a big part of it, but the antechamber is beautiful in its own right, and the view looking north from its southern end is as good as it gets.  The main body of The Wave is just that.  Please do not linger in the main body.  There are no very good angles to shoot there, and you will totally mess up everyone else’s shot.  On the day we visited The Wave, a kooky little  French clown in red converse high-tops danced around in there for about 30 mins shooting freehand until a chorus of photographers chased him out.

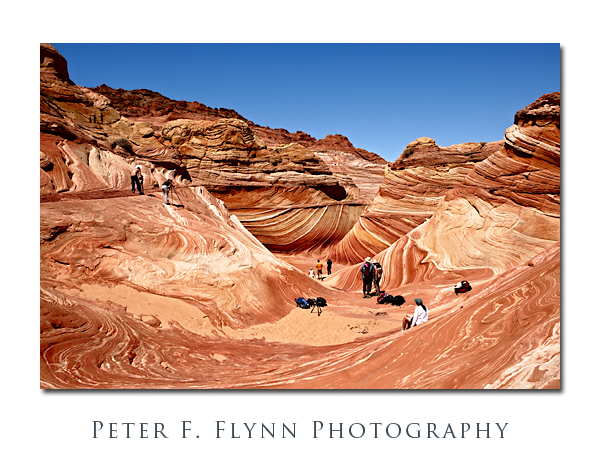
The grandstand is where most of the photographers will be setup, and for reference is the point from which most published images of The Wave are/were shot.  It can get a bit crowded here, but most shooters are polite, and rotate positions often enough so that everyone gets a chance to make a memorable image.  The Wave2 is well worth a visit too, and although it lacks the intense color variations found in the The Wave, has deeper striations that are best complemented by the morning light – I said to get an early start, right?  The backrooms are all of the areas which lie south of The Wave and the grandstand and a bit east of The Wave2.

The image above, of the grandstand area shot from the cheapseats, was recorded at about 13:15 MST on August 27, 2009, using the Nikon D700 and the AF-S NIKKOR 24-70mm f/2.8G ED lens at 26mm.  Exposure was f/16 at 1/125s, ISO 200 (-0.67 EV).

I hope that you find these notes useful on your experience in The Wave.

An image of the Coyote Buttes North area appear below courtesy of Google Earth.  The entire route is shown, starting with entrance to the Buckskin Gulch near the top, to The Wave, towards the bottom  middle of the image.  The North Teepees; which are outside of the special permit zone, are to the right of The Wave.

Copyright 2010 Peter F. Flynn. No usage permitted without prior written consent. All rights reserved.
The Myth of Golden Hour, Part I

The Golden Hour is a classic photographic nutshell that recommends that the best times for recording images are approximately the first hour after sunrise, and the first hour prior to sunset.  This concept is so neatly set in the minds of photographers that it has come to suggest that high quality images can only be recorded during the Golden Hour intervals.  The point of this series of entries is not so much to debunk the idea, as to provide a practical example of  the relatively facile and powerful modern digital processing methods.

We should first consider what it is about the Golden Hour that make this time so special for recording photographic images.  During the Golden Hour, the angle of the sun with respect to the horizon is small, certainly less than 15°, so that the light directly from the sun travels a greater distance though the atmosphere; which reduces its intensity, and also produces characteristically relatively long shadows.  Moreover, the relative contribution to the overall light intensity from the sky is enhanced.  This sky light is characteristically extremely diffuse, e.g., think of the sky as the ultimate light diffuser.  In terms of the color of the light, the longer path traveled by the light leads to a relative decrease in the blue component due to dispersion, leaving a relative enrichment in yellow and red components.

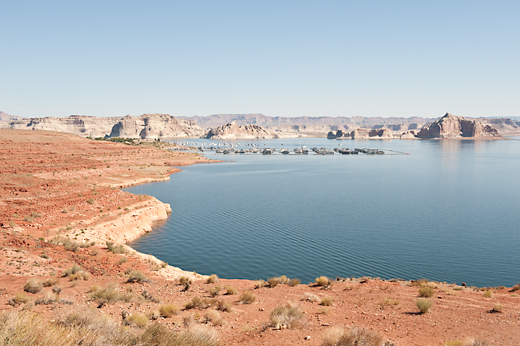
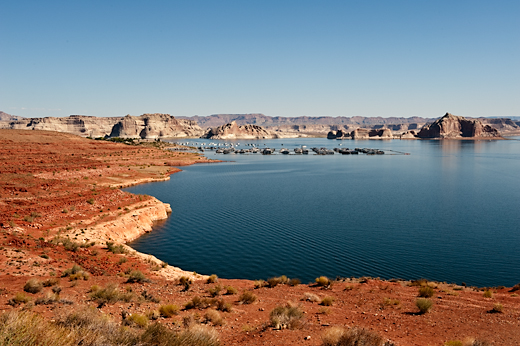
On the day that the image shown above was recorded, August 28, 2009, sunrise occurred at approximately 06:50 MST.   The image was recorded at 10:45 MST, well outside of the Golden Hour, and exhibits the overwhelming highlights and deep harsh shadows that are characteristic of images recorded near mid-day.  The image was recorded using the Nikon D700 and the AF-S NIKKOR 24-70mm f/2.8G ED lens at 44mm.  Exposure was f/16 at 1/125s, ISO at 200.

The image is pretty washed-out/over-exposed.  Although we might have been able to do more with an exposure at -0.67 EV, there is little doubt that this image would most probably be more appealing, at least in the classic photographic sense, if it had been recorded between 19:00 and 20:00, since sunset on this date occurred at 20:00 (the image was recorded looking westward, e.g., into the rising sun, not a tractable shooting scenario).  The problem was, as it often is, that I wasn’t there during the Golden Hour!  Moreover, obviously most life occurs at sometime other than during the Golden Hour.  Is there anything we can do to add more pleasing contrast and color saturation to such images?  I certainly think so, otherwise I would have written this entry!

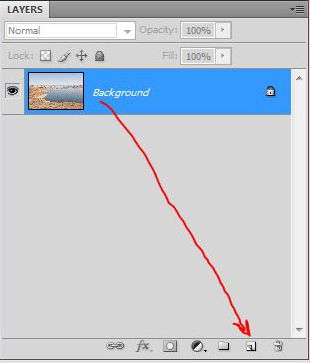
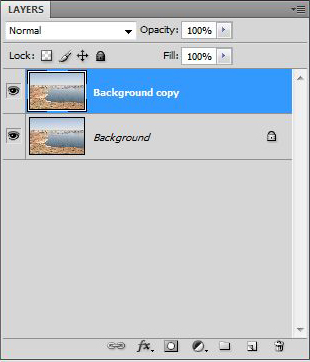
Let’s begin with a simple fix, which is to add a new layer on top of the original layer, and change the blending mode of the new layer to ‘Multiply’.  Begin by dragging the Background layer to the copy layer icon, thus generating the Background copy layer as shown below:

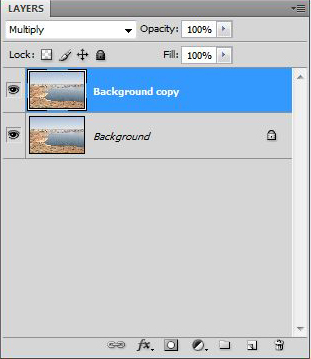
Now change the ‘blending mode’ of the Background copy layer to Multiply as shown below – note that the pull-down menu tab contains a number of blending options – select the downward pointing arrow to the right of ‘Normal’ underneath the Layers tab to reveal them.

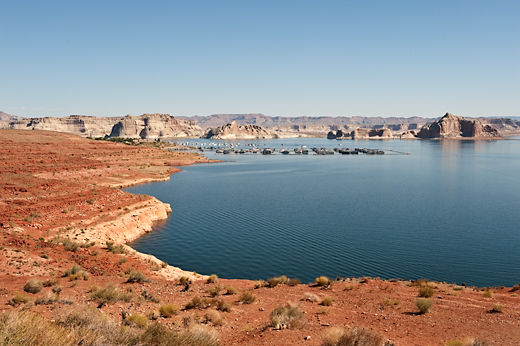
The result is shown below.  I’d suggest that there may be no simple move that produces such a dramatically improved result as the addition of a Multiply-layer to a washed-out or overexposed image:

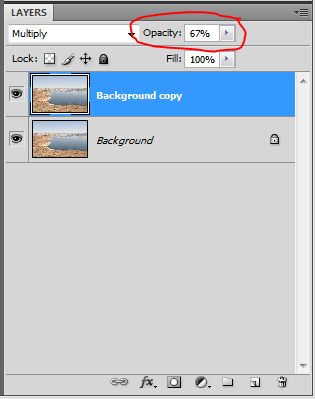
Finally, we can vary the extent of the blending of the top layer into the bottom layer by adjusting the opacity of the top layer.

I hope that you have found this entry to be useful.  Good luck on your own efforts.  Keep shooting, and don’t believe ’em if they tell you you can’t make solid scenic color images outside of the Golden Hour.

Copyright 2010 Peter F. Flynn. No usage permitted without prior written consent. All rights reserved.